Monday, September 3, 2012

GF Brownie Bites

One of the things that makes me the saddest about being GF is the lack of yummy cakes, cookies, and brownies I can have.  I miss having a good, chewy, delicious double chocolate brownie.  NOM.

Luckily, a friend of mine posted this pin on her website and I tried it out that evening.  It. was. DELICIOUS.  It almost makes being GF ok.


Almost.


Anyway, here's the recipe.

Ingredients:
  • 3/4 cups white sugar
  • 1/4 cup brown sugar, packed
  • 1/2 cup unsweetened cocoa powder
  • 1 cup peanut butter (fun fact: I ran out of regular PB when making this, so I used about 1/2 cup regular and 1/2 cup dark chocolate PB from Wegman's. I'm not sure if that affected the consistency of the dough or not, but it sure was delicious)
  • 1 egg
  • 1 teaspoon vanilla extract
  • 1/2 cup to 3/4 cup chocolate chips (I used more like 1 cup and I think it was a bit too much.  There wasn't enough dough to really incorporate the chocolate chips into!)
Directions:
  •  Mix everything except the chocolate chips into a bowl and stir by hand.  (I found the dough to be pretty crumbly and not what you expect with cookie dough.  Just a heads up!)
  • Once all of those are mixed together, add in the chocolate chips.
  • Put the mixture in the fridge for about 10 minutes, then form into 1 inch balls.  Since I had so many chocolate chips, I kind of had to mold it into balls and then pick up the chips by hand and press them into the dough.  Also, the dough was reallllllllly crumbly, so this part got a little messy.
  • Bake on a cookie sheet at 350 for 10-12 minutes.  (It's hard to tell if they are done, since they're chocolate.)
  • Eat a million of them all at once because OMG THEY ARE SO GOOD. 
Seriously.  They are SO. GOOD.  We had a friend over and we were talking about how I was GF and he made some comment about how all GF food is gross, barf, etc.  Then we served him these cookies and he said they were some of the best he's ever had.  So.  Go make these.  NOW.  

Saturday, August 25, 2012

GF French Toast Bake

One of the things that I think tastes the worst in the GF world is bread.  YUCK.  I recently went on a mission trip and the menu was PB&J for lunch, so I made sure I had a loaf of GF bread for myself.  It was awful as a two-piece-of-bread sandwich and only mildly tolerable as an open faced sandwich.  I choked it down on the mission trip, but couldn't bring myself to eat it here at home.

So I started thinking of how to improve on it.  French toast came to mind last night at about 11:45pm.  I decided to google a quick overnight French toast bake, with the idea that maybe if all the yummy gooeyness of the French toast-ness had time to soak in, you would hardly notice the bread itself.

I found this recipe  from The Girl Who Ate Everything and thought I'd give it a try, with a few LOT of changes, since it was spur of the moment and I didn't have everything on hand.

Verdict: YUM!  I haven't had French Toast in years, so I don't remember what my mom's used to taste like, but this was delicious.  And, most importantly, you couldn't tell it was GF bread.  The texture was great - not too soggy, not too GF tasting.  I think it could do with less nutmeg, but the hubs says he likes it. 

Ingredients
  • GF sliced bread
  • 1/2 cup brown sugar
  • 2 tbsp Canola oil (or butter - we didn't have any on hand so I subbed the oil)
  • 3 eggs
  • 1/2 cup soy milk (or regular milk - whatever you use)
  • 1 tsp vanilla extract
  • Cinnamon and Nutmeg (or pumpkin pie spice - whatever floats your boat!)
Directions
  1.  Pour the canola oil in the bottom of an 8x8 pan and use a pastry brush to coat the bottom of the pan.  Sprinkle the brown sugar on the oil.
  2. Put 4 slices of bread on top of the sugar.  I had some pretty big open spaces, so I used a fifth piece (torn up) to fill in the gaps.
  3. In a small bowl, combine eggs, milk, and vanilla extract by whisking together.  Pour over the bread, making sure to coat evenly.  Sprinkle the cinnamon and nutmeg on top of the egg mixture.
  4. Cover with foil and put the pan in the fridge overnight.  When you're ready for breakfast, pull the pan out of the fridge while the oven preheats to 350.  Bake for 30-35 minutes.
I think you could easily double this recipe and put it in a 9x13 pan to serve more.  You can use regular bread, too - someone mentioned challah and I bet that would be amazing!!

Serves 4
Calories: 370 per serving

Tuesday, August 21, 2012

Zucchini Noodle Lasagna

In my quest for GF food, I've been doing a lot of pinning to Pintrest lately, especially to my Kitchen Shenanigans board. As I said in my last post, I LOVE me some Italian food and have been wanting lasagna for a while now, but I hadn't found GF lasagna noodles.  (Fun fact: Wegman's now has some!  I found them after I decided to try this recipe, so if zucchini isn't your thing, but you're GF you are in luck!  As long as there is a Wegman's near you!)

I pinned this recipe from Jo and Sue awhile ago and thought I'd try it out, but with a few tweaks.  I didn't want a strictly VEGGIE lasagna, as G likes to have protein with his meals and refuses to acknowledge that you can get protein without meat or tofu.  But, whatever.

Here is my recipe, adapted from Jo and Sue.


Ingredients:
  • 3 large zucchini (FUN FACT:  I totally had to google what the plural of zucchini is.  It is, in fact, zucchini.  Also, I had to spell check plural because I spelled that wrong, too.  Plaural is not correct, FYI.)
  • 1 package pork sausage (or ground turkey or ground beef, whatever you prefer)
  • 1 package frozen spinach
  • 1 large can crushed tomatoes (I used a 28 oz can and could have used more)
  • Oregano
  • Basil
  • 1 tub ricotta cheese
  • 1/2 package mozarella cheese
Directions:
  1. Slice zucchini into thin strips.  I used a mandolin because I registered for one for the wedding and figure I better use it.  If you are more talented and less clumsy with a knife than I am, you can probably just do this by hand.  Arrange the zucchini on baking sheets and bake at 425 for 5 minutes on each side. When they are done, lower the oven temp to 375
  2. As the zucchini strips are baking, brown your meat protein (in my case, pork sausage) in a pot.  Once browned, add your package of frozen spinach and your can of crushed tomatoes.  Add oregano and basil to taste.  I use a 2:1 ration of oregano to basil.  Make sure your meat sauce is fully cooked.
  3. When the zucchini strips are baked and your meat sauce is done, you are ready to assemble your lasagna.  Place one layer of zucchini strips on the bottom of a baking dish and then cover with about 2 cups of meat sauce.  Spread about half a cup of ricotta on top of the meat sauce, then sprinkle about 1/4 cup mozzarella on top.  Then, do it again.  When you have finished the second layer of cheese, add one more layer of zucchini strips with meat sauce and then sprinkle liberally with mozzarella. Unless you don't like mozzarella, in which case, be stingy. ;)
  4. I ended up with a 9x11 pan of lasagna and had enough leftover to also make an 8x8 pan.  Basically, just use up what you have.  Or make it in a 9x13 to begin with.  Either way.
  5. Cover with foil and bake at 375 for 50 minutes.  Then remove the foil and bake for another 10 mins.  When you take it out of the oven, if it seems a little soupy let it sit for about 20 minutes to reabsorb some of the liquid.
  6. Serve on a plate and try not to eat yourself stupid.  It will be difficult, because this is DELICIOUS.
Just for reference, using the recipe I made I did a quick calorie estimate and came up with about 250 calories per serving - but my two pans yielded 10 servings that were BIG pieces.  It also only has 12 servings of carbs, so if you're looking for low-carb this is a great option, too.

Monday, August 20, 2012

Adventures of Gluten Free Living

A few months ago, after poking around on the internet, I decided to try being Gluten Free (GF) for the month of May, just to see what would happen.  After doing some reading on the internet, I didn't think I had a gluten intolerance, but I had read that being GF gave you more energy and was good for allergies.  I've been tested multiple times for anemia and mono due to my severe lack of energy in life and I've suffered from allergies since I can remember.  I figured at the worst, it would help me cut out too much processed crap (cake, brownies, cookies, pasta, etc) and at the best it would make me feel better.

Well.  I did feel better.  A LOT better.  I wasn't exhausted all the time (tired, yes - exhausted to the point of feeling like I couldn't function, no) and I actually stopped taking my allergy pill and felt fine.  In May.  When the pollen comes out and turns our cars yellow.

This was an exciting moment.

But then May ended and I figured I'd end my experiment and just go back to living life how I always had, eating whatever.  And I started feeling like crap.  I had headaches nearly every day - which, I realized, I had been dealing with for almost as long as I could remember.  They weren't BAD every day, necessarily, but definitely a low-grade headache almost daily.  And I had stomach aches and reflux issues, which again I realized I had been dealing with on a daily basis.

All of that had disappeared when I went GF for May.

So, after a few more months of experimenting and going back and forth between feeling great and feeling like crap, I think I have figured out that I may have some sort of gluten intolerance.  I seem to have a magic threshold that if I go over, I am miserable, but if I can stay under, I am ok with a small amount of gluten.  On the plus side, this means I can have a tiny piece of cake at birthday parties, or try my MIL's lasagna without offending her.  On the minus side, it means I can ONLY have a small piece of cake or TRY the lasagna.  Italian food is my all-time favorite.  I cried when I realized that my favorite restaurant in the world is now probably a "Well, I guess I want it badly enough that I'm willing to feel awful for a few days" place to visit.

And my obsession with baking cupcakes and decorating cakes?  Well.  I've tried pretty much every kind of GF baking mix that's out there and I have yet to find anything that I think is worth buying.  I have not yet ventured into the "buy a kitchen scale and bake from scratch" mode of GF baking, but it may be coming soon.

In the meantime, I've been trying to figure out both new GF recipes and ways to adapt some of my old favorites to be GF.  I'll post them as I use them - whether it's a keeper of a recipe or a fail.

Some people have asked me about being GF and if I have any tips.  I should preface this by saying that while I try to be as GF as I can, I am not actually as strict as others.  So, if something is processed on the same equipment as wheat or says "May Contain Wheat" I usually try it once, while staying GF with everything else.  If I don't react, I don't worry about it.

To start with, I should say that we don't eat a lot of wheat stuff to begin with. We don't eat bread, we're low on sweets (usually) and G (husband) doesn't like Italian food, so we don't eat a lot of wheat pasta. The biggest wheat thing I ate was Kashi cereals.

For breakfasts, I switched from Kashi to Chex - they have a ton of gluten free options. I also added yogurt, cheese or eggs to get protein, otherwise I am STARVING by like 11am.

Lunch was hard, not gonna lie. I ate a lot of salad with grilled chicken on it or leftovers from the night before. Most fast food was out - no Subway, no Chick-fil-a, nothing with a sandwich. Chipotle and certain Noodles dishes still work, though.

For dinner we made a few changes. Rice and rice noodles were still fine, so we based meals on that. We eat a lot of grilled meat with veggies/salads anyway, so that wasn't too hard. No more regular noodles - although Wegman's has some really good GF pasta that even G didn't mind.

Snacks were hard, too. No pretzels or cookies, cake, brownies, etc. I miss brownies and cake the most. There are a bunch of GF options we tried and they were all....dry. Not great.

The biggest swap I made was just to make sure to ALWAYS have veggies, fruits, cheese and yogurt on hand for snacks when I was hungry. And popcorn and nuts. I swapped in dark chocolate for the cakes and brownies when I needed a sweet craving.

Also, I don't drink beer, so I didn't have to worry about that.

Those are my thoughts and hints.  Tomorrow I have a GF lasagna recipe to post that substitutes zucchini for noodles.  It's SO GOOD and almost makes me not even miss regular lasagna.

Wednesday, January 4, 2012

Brown Sugar Body Scrub


My SIL got me this brown sugar body scrub from Bath & Body Works a few years ago and ever since then, I've wanted to find something like it, but cheaper. Luckily for me, pintrest to the rescue! I saw a ton of different "recipes" on there and this is the one that looked easiest to me. Lazy to the rescue, again.

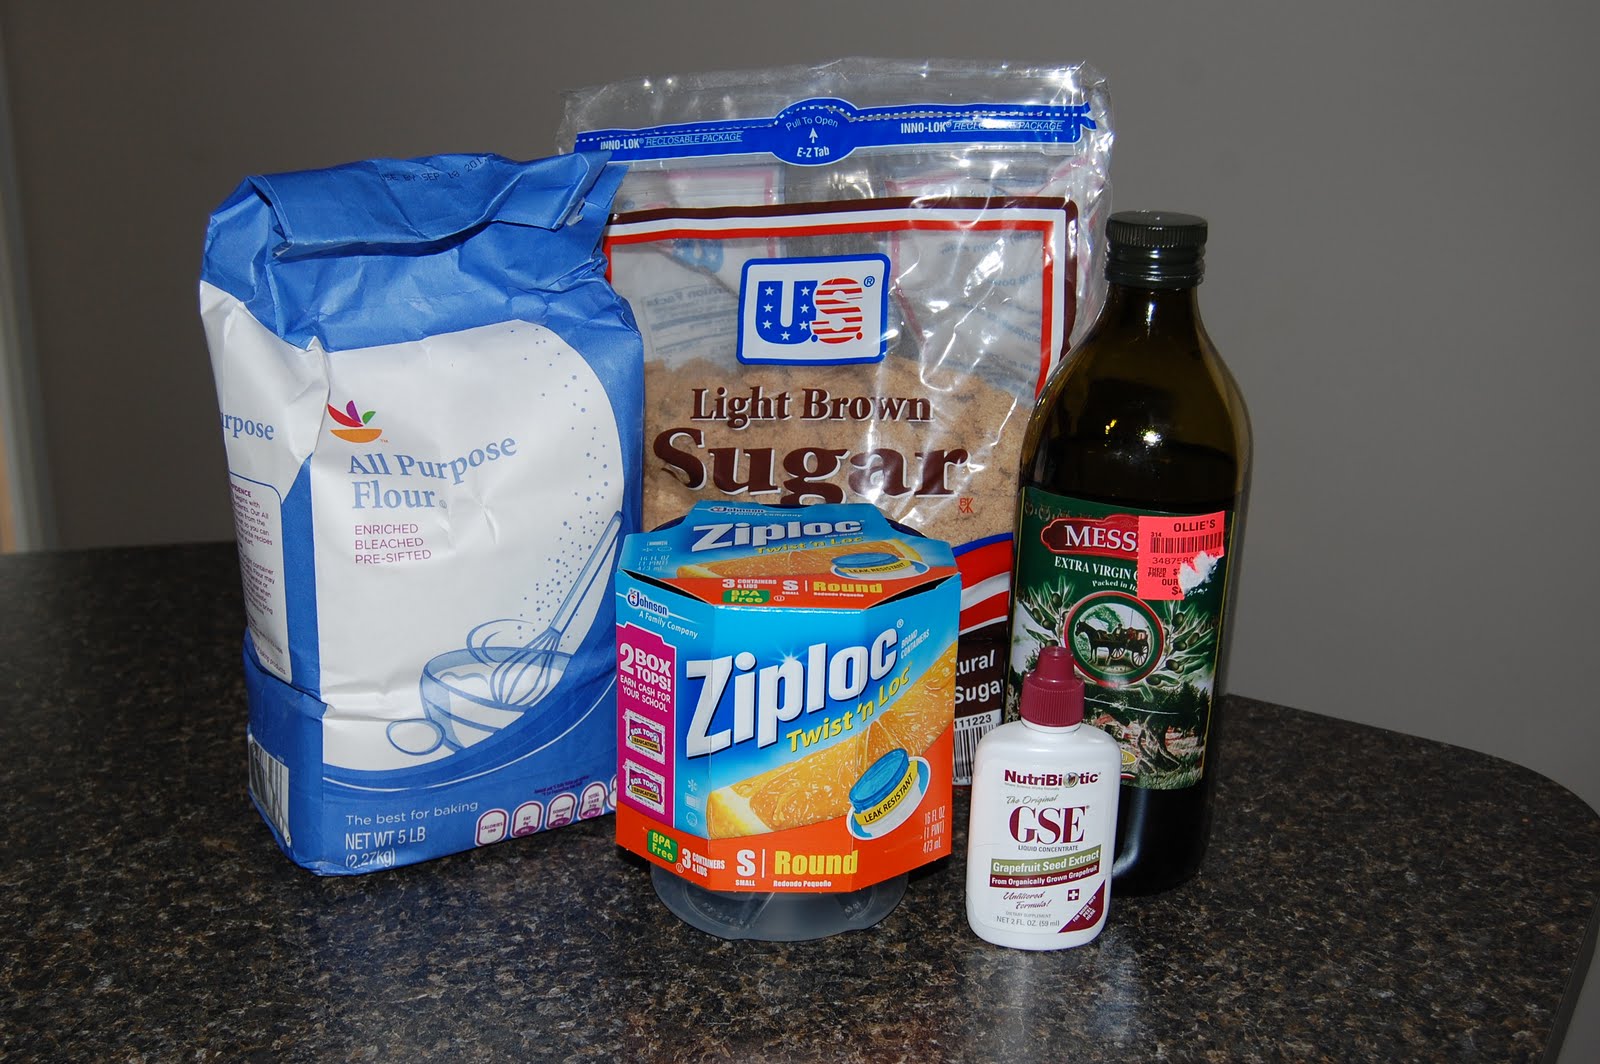
To make this, you need:
-brown sugar
-white sugar (note: in this picture is flour. that is not what you want. don't use it!)
-olive oil (I bought a $4 bottle at Ollie's - not great for cooking, fine for slathering on your body)
-grapefruit seed extract (I bought a bottle for about $8 off of amazon.com)
-plastic containers (I found Ziploc containers with twist on lids, which I think are great for this)

The first thing I did was figure out a ratio of grapefruit seed extract to olive oil. The original recipe said to store this into the fridge...but no way would I 1) remember to take it up to the shower with me or 2) use something cold. I found some other information on the internet that said you could use GSE as a natural preservative, so that's what I went with. I did some math - feel free to check it, since Lord knows I am not a math major - but I think it works out to about a teaspoon of GSE per cup of oil. One cup of oil made about six cups of scrub (three containers) so divide that up as you see fit.

The next thing I did was scoop brown sugar and white sugar into the containers until they were as full as I wanted. Then I dumped the containers into a large mixing bowl and mixed the sugar together. I used about a 1:1 ratio of brown to white sugar, but from looking at stuff on the internet, I think you can use whatever ratio you want.

Once all the sugar is mixed together (get rid of the big lumps that are in that picture and combine until it's a sandy texture) I divided the sugar back up into the containers. Then I added the oil/GSE mixture to the containers.


I don't think there's a right or wrong ratio of oil to sugar, but I wanted to have a little more liquidy/oily mixture. I have super dry skin and I figured it wouldn't hurt to have a little extra oil on it.

As the oil was still trickling through the sugar, I added 1 teaspoon of vanilla extract. I don't think the mixture smelled olive oily, but the vanilla makes it smell SOOOO good!


Once the vanilla and oil had kind of seeped all the way through the containers, I dumped them back into the bowl to mix together. When mixed together, you get a better sense of how wet or dry it is. I think it would be easier to add more sugar, rather than the oil since the oil is mixed with the GSE, but that's just me.


Once everything is mixed together, put back into the individual containers.


I've had mine for about a month now, stored in my shower, and so far, no mold or mildew. Also, it still smells DIVINE! I like to use this scrub as the last thing I do before I get out of the shower and I haven't had to use lotion for a while. It's fabulous. I think it's my new favorite thing that I've made!

Tuesday, January 3, 2012

Apple pie with cinnamon roll crust


I found a recipe on pintrest for a cinnamon roll crust and was intrigued. I love anything apple cinnamon, so wanted to try this. What better day than Thanksgiving to experiment on the people you love, right? ;)

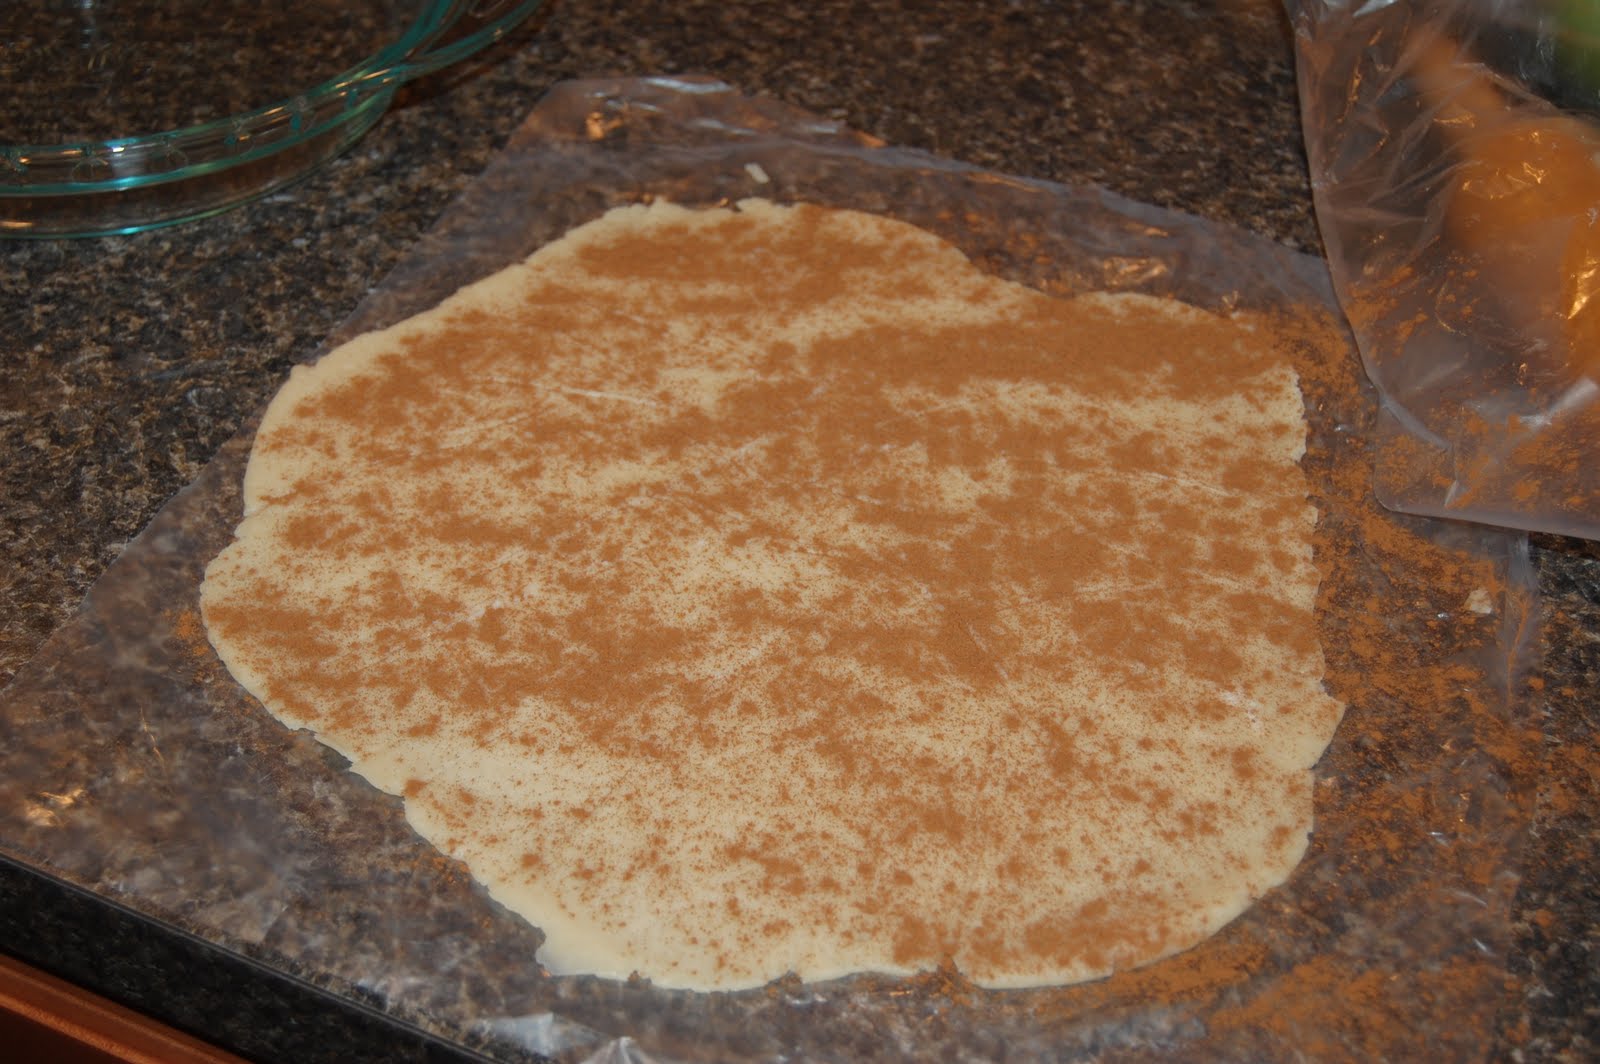
The best part about this was how EASY it was. I just bought a pie crust and went from there. (I prefer Trader Joe's pre-made crusts - I always get compliments on my pie crust!) I laid it out on the counter and then generously sprinkled with cinnamon.


After you've sprinkled with cinnamon, just roll it up into a log and start slicing at as close to the same thickness as you can get. Don't worry that the crust log kind of flattens out when you cut through it. Also, be sure to cut the slices a little thicker than you want your crust to be - you will roll it with a rolling pin one last time before baking.


When you've finished cutting the log, lay out all the rolls. I just made a square. Also, I went back in and filled in any big holes with some scrap pieces - the ends didn't really cut well enough so those were perfect for this!

Once they were all laid out, I put another piece of wax paper on top and rolled with a rolling pin to get it to all stick together. Take the wax paper off the top and then flip it over into your pie pan. Carefully - CAREFULLY! - pull off the remaining piece of waxed paper and press into your pie pan.


Then fill with your favorite apple pie filling recipe. I forget what recipe I used, but all I know is that I haaaaaaaaaaate having too much crust and not enough filling, so I filled it way, way up. WAY, way up!


Helpful hint: If you overfill your crust like this, bake it on a cookie sheet so that as the goop inside leaks out, you don't flood your oven with goopy syrup that burns black smoke and sets off your smoke detectors. Trust me.


This crust turned out DELICIOUS! We all loved it and went back for seconds. I will definitely be using this as my go-to apple pie crust from now on!

Thursday, November 17, 2011

"Give Thanks" banner


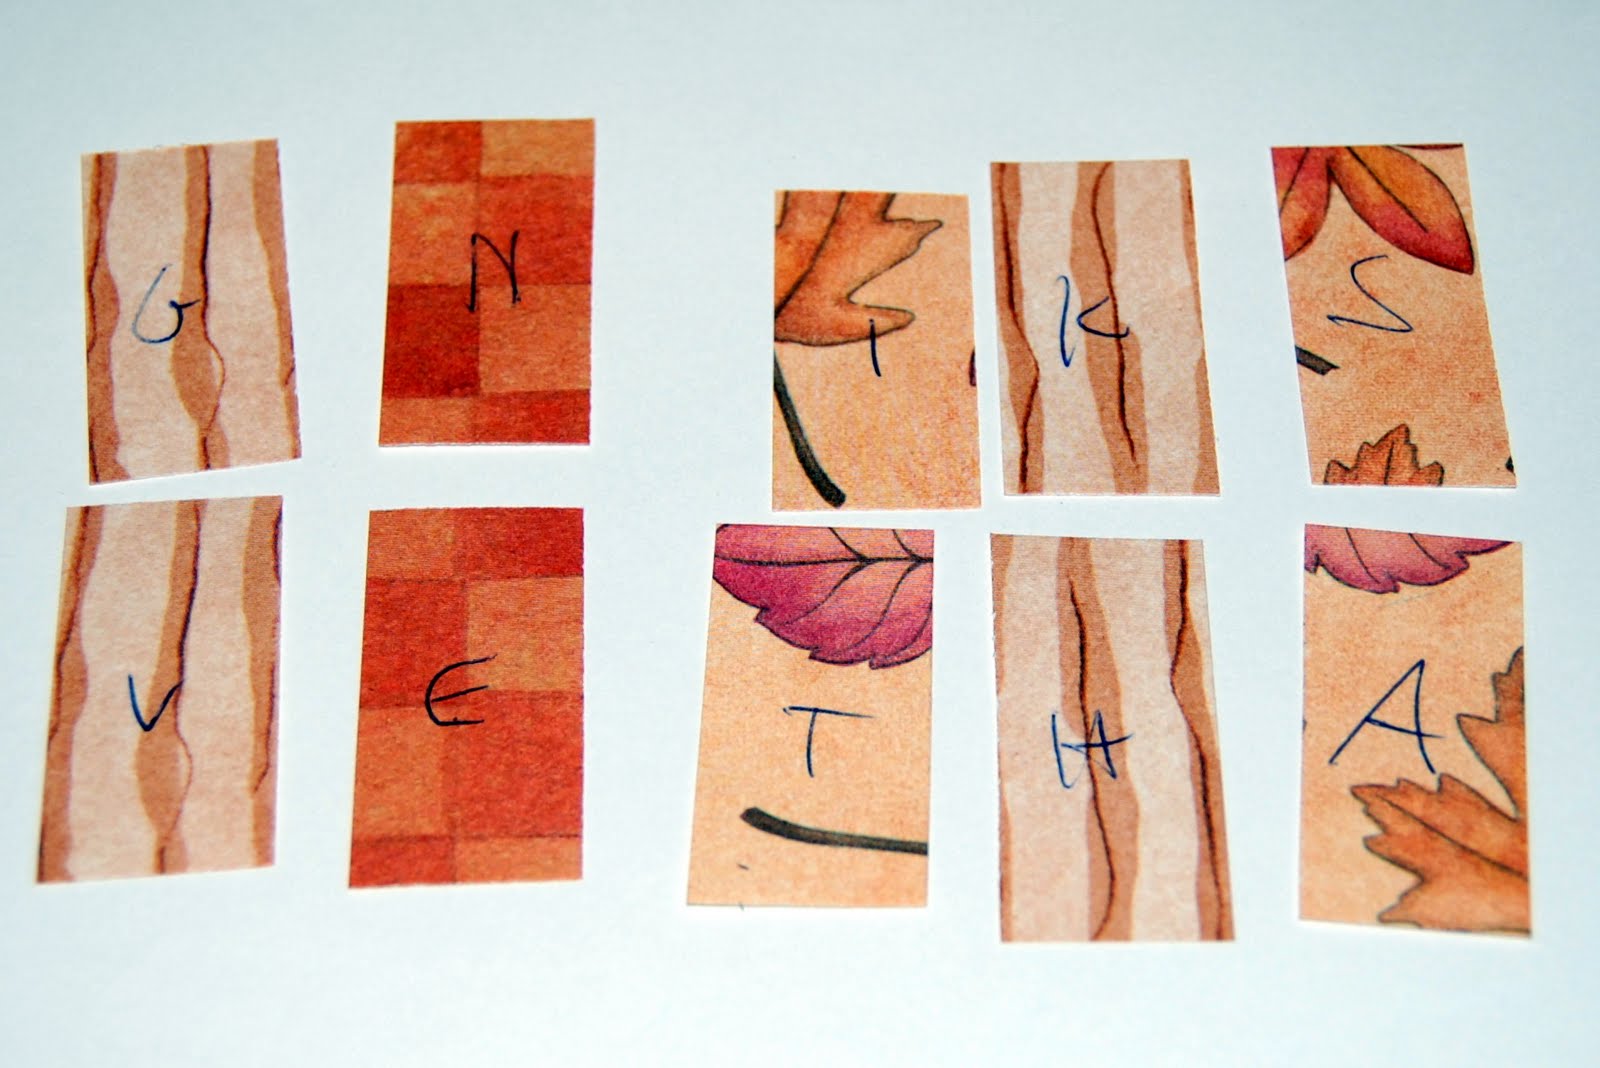
Because I loved my Halloween fabric banner so much, I decided to make a banner for Thanksgiving as well. I didn't want to do the same thing, though, so I browsed through pintrest and found a free printable. I didn't want to use up all of my color ink, though, so I took the general idea of the printable and created my own banner. I started by picking out some fall looking scrapbook paper out of my pile of stuff. Once I had the paper picked out, I cut a small piece off of each one to lay out how I wanted the letters to print out.


Once I had the paper in the order I liked, I wrote out "GIVE THANKS" on the pieces and then grouped them together by paper type.


I knew I wanted to print out two letters per page, so this way I knew exactly which letters to put together. At this point, I just opened a word document and picked a font I liked. I added a simple border from AutoShapes and tweaked the size until I could get two on a page in a size I liked. The letters actually turned out a LOT bigger than I thought they would be, but the size worked for the space I have. The most annoying part of this project was cutting everything out. I used my paper cutter to cut on all the straight lines and scissors for the curves.

Once the letters were all cut out, I laid them out on the floor on a piece of ribbon. I stuck them on using double sided tape so they would be easy to move around and arrange if it wasn't what I wanted.


Well, it turned out that I got it basically how I wanted on the first try. Because I am lazy, I didn't go back and glue gun the letters on or glue gun the ribbon onto itself to make a loop. This was a mistake. The banner has fallen several times. I need to go back with the glue gun and permanently attach everything so that it can be reused without fear of falling apart!


Like I said, the letters are bigger than I thought they would be, but are the perfect size for being on the bookshelf! I think it's really cute and I love how it turned out. If they had matte laminating, I would probably laminate it to make it more durable and lasting. This project cost me a grand total of zero dollars, as I had all the materials on hand already. That's my favorite kind of crafty project: FREE!