Thursday, November 17, 2011

"Give Thanks" banner


Because I loved my Halloween fabric banner so much, I decided to make a banner for Thanksgiving as well. I didn't want to do the same thing, though, so I browsed through pintrest and found a free printable. I didn't want to use up all of my color ink, though, so I took the general idea of the printable and created my own banner. I started by picking out some fall looking scrapbook paper out of my pile of stuff. Once I had the paper picked out, I cut a small piece off of each one to lay out how I wanted the letters to print out.


Once I had the paper in the order I liked, I wrote out "GIVE THANKS" on the pieces and then grouped them together by paper type.


I knew I wanted to print out two letters per page, so this way I knew exactly which letters to put together. At this point, I just opened a word document and picked a font I liked. I added a simple border from AutoShapes and tweaked the size until I could get two on a page in a size I liked. The letters actually turned out a LOT bigger than I thought they would be, but the size worked for the space I have. The most annoying part of this project was cutting everything out. I used my paper cutter to cut on all the straight lines and scissors for the curves.

Once the letters were all cut out, I laid them out on the floor on a piece of ribbon. I stuck them on using double sided tape so they would be easy to move around and arrange if it wasn't what I wanted.


Well, it turned out that I got it basically how I wanted on the first try. Because I am lazy, I didn't go back and glue gun the letters on or glue gun the ribbon onto itself to make a loop. This was a mistake. The banner has fallen several times. I need to go back with the glue gun and permanently attach everything so that it can be reused without fear of falling apart!


Like I said, the letters are bigger than I thought they would be, but are the perfect size for being on the bookshelf! I think it's really cute and I love how it turned out. If they had matte laminating, I would probably laminate it to make it more durable and lasting. This project cost me a grand total of zero dollars, as I had all the materials on hand already. That's my favorite kind of crafty project: FREE!

Tuesday, November 15, 2011

Thanksgiving wreaths


Does it really annoy anyone else that they go straight from Halloween decorations to Christmas? There's a whole holiday in between! Unfortunately, I seem to have bought into the idea of Thanksgiving not counting as a holiday, since I have exactly six things to decorate with: a turkey salt shaker, turkey pepper shaker, and four place mats shaped like leaves. SO, I decided that I was going to decorate for Thanksgiving this year by making all my things! I gave myself $20 at the dollar store and bought some stuff. The first thing I made were these wreaths. I saw something on pintrest about taking dollar store stuff and painting it with metallic paint, which makes it look a little nicer.


Here are my supplies: four wreaths, a thing of fake leaves and a thing of fake flowers. I picked the flowers based on what I liked best with the petals. I didn't worry about the colors, since I knew I'd be painting them anyway. Total cost: six dollars.


The first thing I did was pull off some leaves and a flower head. If you are stressed, this is a fun thing to do. Makes you feel better. =)


Next I spray painted them all gold. I wanted to use a few metallic colors to look more fallish, but we only had gold on hand and I didn't want to spend more money. If I had other colors - like a metallic red or something - I would have lightly sprayed the leaves on top of the gold, just for some contrast.


I was lazy and only painted the front of the stuff, as you can see from this picture. (I might end up painting the back, just because you can kind of see the red of the flower from the side. But, it depends on how lazy I am feeling when I get some free time!) I also had some ribbon on hand that I used to hang the wreath. I just threaded the ribbon through one of the gaps in the wreath and glue gunned it on.


I think it turned out pretty cute! I definitely don't think it looks like it's from the dollar store, which was my ultimate goal. These wreaths are small and cute and hang on our inside doors. I'm still waiting for my pintrest inspiration for an outdoor wreath for the front door.

Tuesday, November 1, 2011

Lamp Makeover

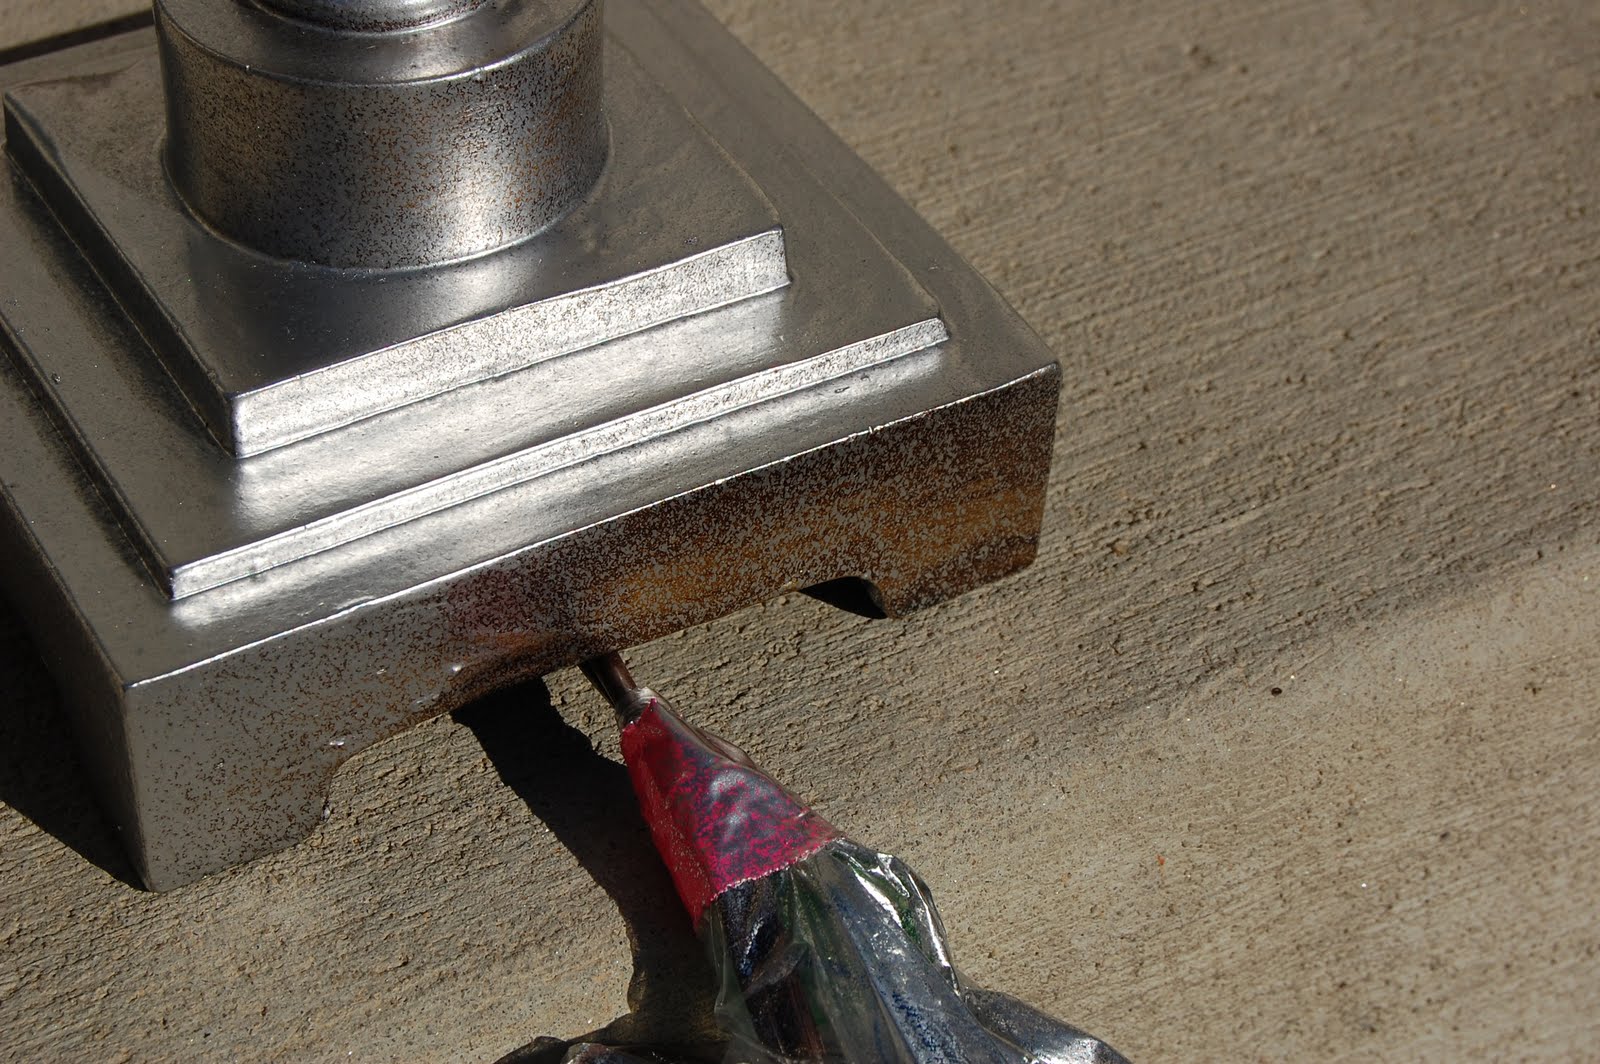
When my husband and I moved into our new house, we needed bedside table lamps. My mom had these sitting in her house and offered them to us. Free is always better than not free, so I took them, but I've never really loved them. Plus, with our new white and gray bedding, they really didn't go. This picture really doesn't do justice to just how ugly they were.

I decided to paint them and figured if I screwed it up, then I could go buy new ones because again, these were free, and I really wanted to replace them anyway.

I started by bagging and taping the important parts of the lamp - the bulb and switch and the cord. I put a sandwich baggie over the bulb and then folded a page of a magazine in half and taped it around the base. My lampshades were big enough to cover anything that didn't totally get painted, so I wasn't too worried about it.

Try not to be too jealous of my hot pink duct tape. It's pretty awesome. ;)

I used Valspar spray paint for this, but only because I had it on hand in silver. We had thought about doing a non-metallic color, but again, free always wins in our house.

When I read the directions on the spray paint, it said to sand a glossy surface first. Well, I am lazy and, AGAIN, if I screwed this up I didn't really care because free lamps are free. So even though the lamps are some kind of metal and the finish on them was shiny, I didn't sand it down.


Now, see how the paint is not covering the surface evenly? I think it would have covered better if I had sanded it down.


This is what it looked like after one coat. I was originally going to do two or three coats and make it a smooth, even finish but I actually kind of liked this look. It was antiquey and, as mentioned before, I am lazy so that was good enough. If it annoys me in a few weeks, I can always repaint it again.

One helpful hint - try to make sure you get every part of the lamp as you are painting if you only want to do one coat. I didn't get this part and figured I'd get it with the second coat, but then decided not to do the second coat, so I had to make sure this part of the lamp faces the wall.

I like these SO MUCH BETTER. It just goes so much better with our room and our bedding and it lightens everything up. My next project is to figure out what to do with the lampshades - I was originally going to replace them, but now I am thinking of maybe just embellishing them a bit to tie into the bedspread. We'll see what happens!


You can see a better view of the "antique" finish here. I don't mind it, but you may want to do the second coat for a smoother finish.

Monday, October 17, 2011

Halloween Banner Scraps

When I finished making the Halloween Banner, I had a bunch of scraps leftover that had already been cut. I put one of each design on a short piece of ribbon and tied it to the chandelier over our stairway.

Then I got this fun idea to make little rings of fabric to put on each newel post on our stairs. This was pretty simple - I tore off a magazine cover (Rachael Ray, if you're wondering) and used duct tape to tape it into a ring. Then I put the fabric on in the same way I made the banner, only I made sure they were right next to each other so you couldn't see any of the magazine page.


After I made one to see how it would turn out, I counted the actual number of newel posts in our house and decided that one was enough. I just did not have the patience to make thirteen, plus the downstairs railings are covered with spider garlands anyway! =) Maybe I'll make one a year and in a few years, have enough.


You could also make these to hang on door handles to make all of your doors a little more festive!


Our house is almost done being decked out for Halloween! I can't wait to see all the little boos and ghouls who come in two weeks!

Thursday, October 13, 2011

Halloween Fabric Banner


I found this super cute banner on Pintrest the other day and I had some time on Monday so I wanted to try it out. It was a lot easier than I thought it would be and it turned out so freaking cute!!!


Supplies:
-Halloween fabric scraps (I didn't have scraps, so I went to JoAnn fabric and got 1/2 yard of five different fabrics. I had originally planned to just make one banner but I had enough to make two. Actually, probably three!)
-Ribbon (the original plan used clothesline, but the ribbon was on sale and I think it turned out cuter to have the fabric scraps a little farther apart.)


Once I had my fabric, I started cutting it into about one inch strips. I found that just folding the fabric and making a crease gave me an easy line to follow and they ended up much straighter if I did it that way. If you are a perfectionist, I am guessing you could iron creases or mark the fabric somehow.

The strips were about one inch wide and a third of a yard long. Again, perfectionists probably could have measured, but I just folded them into about thirds and cut. Once the strips were cut, I laid them out to figure what order I wanted them in.


To get the fabric on the ribbon, you make some sort of knot. I forget what kind of knot it is, but here are step by step directions.


I started by cutting two yards worth of fabric and didn't like how empty the banner was, so I cut one more yard in thirds. I only used two pieces of each fabric, so I had to find something to do with the scraps. I'll show you what I did with the scraps later!


The banner turned out really cute!! I don't have a mantel to hang this on, but we have this awesome bookshelf from Ikea that I hung it on. For easy hanging, I put command hooks on the unit. I can leave them on if I end up making a Thanksgiving banner...and a Christmas banner....and a Valentine's banner....and a St. Patrick's Day banner...I'm officially addicted!

Friday, October 7, 2011

Two ingredient pumpkin muffins


I found a recipe for pumpkin muffins online today at Miss Zoot's blog and decided I needed to try them. Like, now.


I had to run to Target from some stuff anyway, so I grabbed a 15oz. can of pumpkin and a box of spice cake mix while I was there.

This recipe is as easy as "put cake mix in a bowl, dump in can of pumpkin, mix until fully combined." Warning: this was a messy recipe for me. Unlike a regular cake mix, where the dry mix incorporates pretty quickly and easily, this recipe made a bit of a mess with the dry ingredients. (Of course, it could have been the fact that I used a really small bowl. And I was impatient.)

Once everything is fully mixed together, put in muffin tins. I sprayed with Pam first and they popped right out when they were done cooking. I baked at 350 for 25 minutes and they are PERFECT. Delicious and amazing. I am so glad I made them!

I kept them plain so we can have them with dinner, but I bet they would be a great dessert if you frosted them with a cinnamon or cream cheese frosting.

Thursday, October 6, 2011

Mumsy!


Before we left on our honeymoon, we had a whole collection of potted flowers on our front step. My parents took them to their house to take care of them while we were gone for three weeks and my mom decided she liked them so much that I wasn't getting them back.

So I decided that I needed new potted plants for the fall and while I was at it, I wanted to make some super cute pots for them. I think it would be fun to paint another one orange and make a jack-o-lantern face and another one green for a Frankenstein face.

Anyway, this one is a mummy and it pretty easy to make.

Supplies:
-one flower pot in whatever size you need
-white duct tape
-black foam
-purple glitter glue (I had this leftover from the Boo wreath)


To make the pot, just tear off strips of duct tape and layer them on and around the pot. I found that working with shorter strips (maybe about 8 inches) worked the easiest. Since the pot is not a straight cylinder, the duct tape strips won't go flat or straight, so you have to layer pretty well. When the pot is covered with the tape, cut out your black foam eyes. I simply attached them by putting a piece of duct tape at the top and bottom. Once the foam was attached, I added the "eyeballs" with purple glitter glue.

Because I love a pun, I bought a mum to put in my flower pot, which means I am now calling it...a MUMSY!!!

Isn't it super cute???

Tuesday, October 4, 2011

Halloween Wreath


I have been looking for a Halloween wreath for several years now and never really found one I liked. I've seen a ton of super cute wreaths on Pintrest, but none of them looked 1) easy or 2) waterproof. So I decided to just make one myself.

I was at AC Moore the other day and all of their Halloween stuff was half off, so I bought two Halloween garlands, a wire wreath frame, glitter glue and the letters B-O-O for about $10 total.


To start with, wrap the garlands around the wire form. I was going to see if I could get away with only one garland, but I didn't like how full - or NOT full, rather - it was, so I went back and used both of them. I guess I probably could have (should have?) glued it on to the frame, but it seemed to stay just fine. I think it helped that the garland was wired.


Once that was done, it was on to the letters. I liked the purple glitter with the orange and black, but I think green would look good, too. I coated the front, back, and sides of the letters to make sure that it would be weather-proof. (We'll see how it is at the end of October!)


Once the letters were dry, I tried to figure out what layout I liked better - straight across or following the curve of the wreath. (Is there a fancy word for "following the curve"? I swear there is...)


I liked the curved look better, so once I figured that out I glue gunned the letters onto the wreath. I love how cute it looks!! And I'm hopefully it will turn out weatherproof. It's supposed to be rainy this fall, so it seems like we'll definitely have a chance to find out! Tomorrow I'll tell you about my new flowerpot. =)

Saturday, October 1, 2011

The BEST cupcakes ever. Seriously.


We were halfway into our tailgate when we started eating the cupcakes and my exact quote was "WOW, I know I made these, but these are the BEST cupcakes I have EVER had!"

And they were SO easy.

Buy your favorite cake mix - again, I had a Duncan Hines chocolate - and a coordinating flavor of instant pudding - so, in this case, chocolate. (I bought the off-brand kind because it was on sale and I wasn't sure how this was going to turn out and it was DELICIOUS.)

Make the cake mix according to the directions on the box and then dump in the whole package of pudding.

Bake according to the directions.

These turned out so fluffy and moist and so, so good! I think it's my new default way to make a cake mix!

And it doesn't hurt that the Terps won their game, either! =)

Friday, September 30, 2011

Maryland Cupcake Toppers


Tomorrow we are going to the UMD vs. Towson football game. I am a proud Terp alum, but most of the people at the game are going to be from Towson. I offered to bring the cupcakes and clearly I need to represent for my school! Here's how I made the cupcake toppers for these cupcakes (and the ones in the previous post). First, collect your supplies:


1. Cand
y melts
2. Microwavable mug
3. Pastry bag

4. Silpat (or waxed paper)
5. Your design drawn out on a piece of paper (Or free hand it. Depends on if you want consistency or not.)


Put the pastry bag in the microwavable mug and fill it about halfway with the candy melts.
Follow the directions on the bag for melting them - the kind I used said to melt for 30 seconds at a time on half power. After the first 60 seconds, mine were still not completely melty and squeezable, so I put them back in for another 15 seconds. That was perfect.

Once the candy melts are at the right consistency, put your Silpat or waxed paper over your drawing and just start tracing. I started off tracing the Maryland "M," but didn't like how it was turning out so I free handed most of them. They are definitely NOT consistent, but I like them anyway. If you want to do small words, like Terps, make sure your piping is thick - the thicker it is, the less it will break.


Once you have filled your Silpat or paper, let them fully set before you start to remove them. I stuck the first set in the fridge, but let the rest set at room temperature and didn't really find a difference in the two. When they are fully set, they won't be shiny anymore. To remove, carefully lift up the Silpat or waxed paper and peel it away from the design.

No matter how careful I am, I always tend to break some, so make sure to pipe extra of anything you really want!

Once you have your toppers, make your cupcakes, frost them, and show your school spirit!

GO TERPS!


Monday, September 26, 2011

Celebration of Life Cupcakes


My friend Cindy had a Celebration of Life party this past weekend. Two weeks ago she celebrated her Leukemia being in remission for five years and this week she turns 30. I couldn't make the party, but I offered to make cupcakes for her. I made four different flavor combinations of cake and frosting and made different toppers to honor the two different achievements.

To make the toppers, I bought candy melts in purple (one of her favorite colors) and orange (Leukemia color). I put the candy melts in a pastry decorating bag and then microwaved them until they were melty. I free handed the ribbons, some hearts and some 30's. With the hearts and the 30's, I put some squiggly lines under them to stick them into the frosting. Because this was a special occasion, I bought some purple luster dust and orange edible glitter. I mixed the luster dust with some vanilla extract and painted it on once the candy melts had solidified. I sprinkled the glitter on the ribbons while they were still melty.


And yes, melty is totally a word.

To make the cupcakes, I followed a very complicated recipe.

Chocolate Cupcakes
1. Buy a box of Betty Crocker chocolate fudge cake mix.
2. Follow the directions for making cupcakes.

I topped the chocolate cupcakes with a Vanilla Buttercream (tinted teal) or a Peanut Butter Buttercream. I just use a basic buttercream recipe that is 2 cups powdered sugar to 1 stick of butter. For the peanut butter buttercream, I used 1/2 cup peanut butter, 1/2 cup butter, and 2 cups powdered sugar.


Strawberry
Cupcakes
1. Buy a box of Betty Crocker white cake mix.
2. Follow directions for making cupcakes with this exception: wash a few strawberries and puree them. I used my Magic Bullet Blender and ended up with about a cup of strawberry puree. The cake mix called for 1 1/4 cups of water so I added water to the puree until I had 1 1/4 cups. Other than that, I followed the directions on the box.

I frosted the strawberry cupcakes with Vanilla Buttercream or Lemon Buttercream. To make the Lemon, I added defrosted frozen lemonade concentrate to the basic buttercream recipe and added more powdered sugar until the frosting was the consistency I wanted.


I am so glad to I got to make these cupcakes to celebrate Cindy and her awesomeness.


I am glad she's cancer free.


And I'm glad she's finally old like me. =)


Happy Celebration of Life, Cindy!